Device Communication Feature Description
CIMON HMIs can connect to PLCs and other HMIs to display important project data in a clear and accessible way. These HMIs support communication with other devices over Ethernet and serial connections, allowing users to present real-time information from PLCs and other controllers. By using an HMI interface, project data becomes easier to monitor and understand compared to reading directly from a PLC.
Device Communication Designer Functionalities
I/O Device Editor
The I/O Device Editor is a tool within Canvas that lets users configure their external PLC, HMI, or controller. In the I/O Device Editor, users can specify if their device communicates over Ethernet or serial. Within the device configuration, users can choose one of the available protocols to communicate. Also supports a redundancy feature, allowing a secondary PLC connection to take over automatically if the primary connection is lost. For more information, see IO Device Redundancy.
To access the I/O Device Editor, go to Tools > I/O Device Editor or click the Open I/O Device Editor icon on the toolbar.
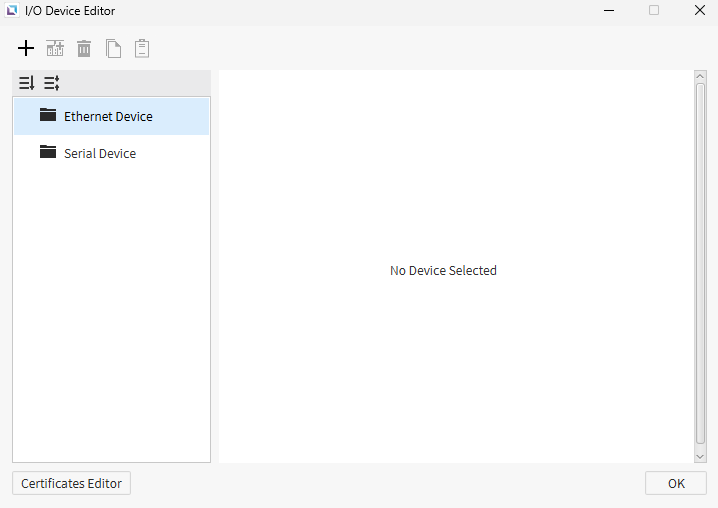
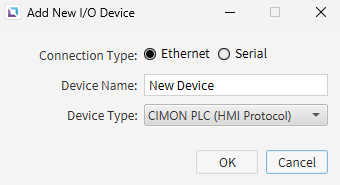
To create a new device, click the + icon to open the Add New I/O Device window. Users can select Ethernet or Serial as the connection type. The device can be named, and the Device Type can be specified. Device Type opens a drop-down of specific devices that Canvas supports communication with.
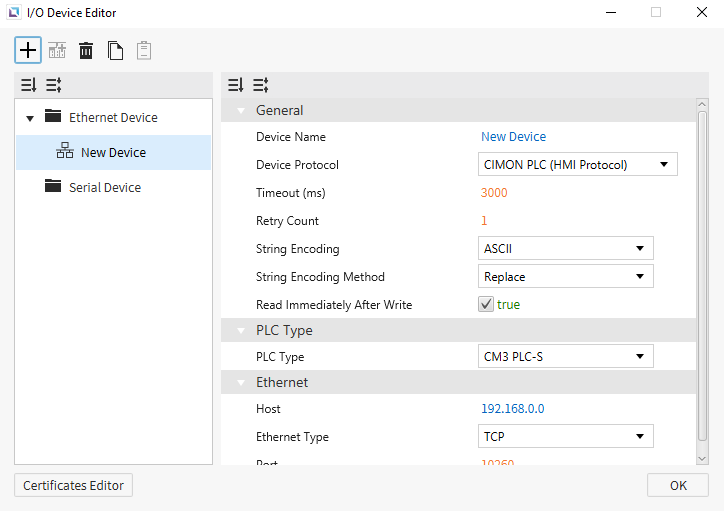
Once selected, the I/O device is created with default settings.
Data Server Editor
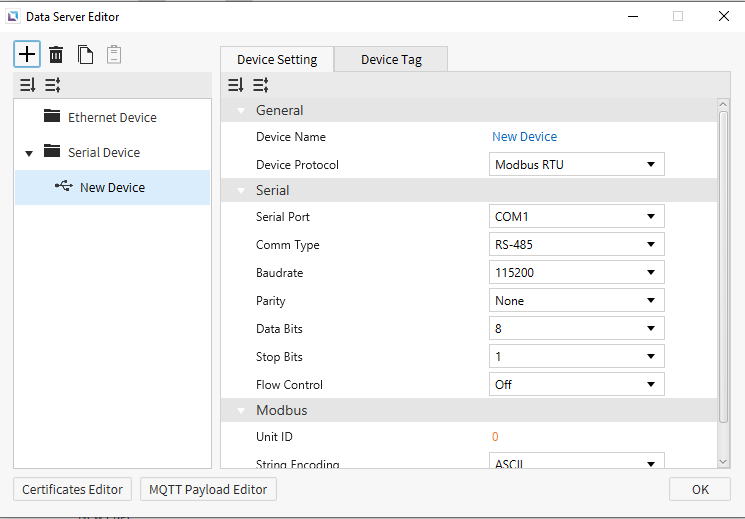
To access the Data Server Editor, go to Tools > Data Server Editor or click the Open Data Server Editor on the toolbar. To create a new device, click the + icon to open the Add New Server Device screen. Users can select the Connection Type as Ethernet or serial for that specific device. Users can also select the Device Type, which will open a dropdown of specific devices that Canvas supports connecting to. Once selected, the data server will be created with default settings.
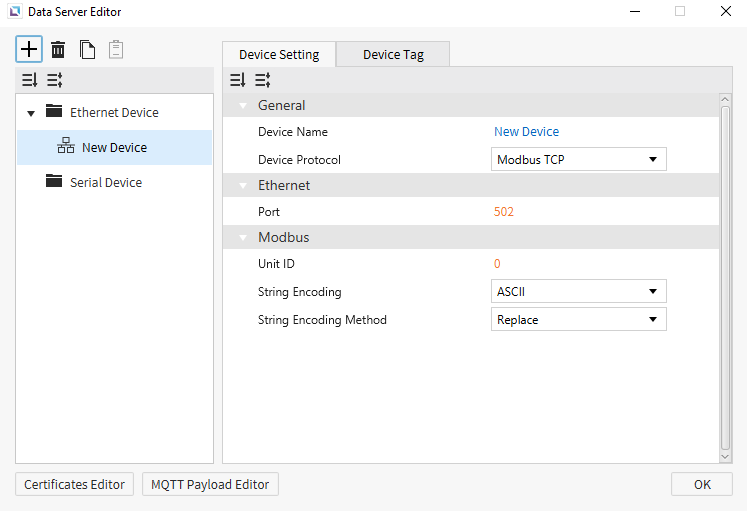
Ethernet Device
Ethernet devices are used when the connection to another device is via an Ethernet connection. Users will need to input the Port of the device they are connecting to for it to connect successfully. For Modbus TCP, users will need to enter the Unit ID via Modbus to connect successfully and the String Encoding and String Encoding Method.
Note: Aside from Modbus TCP Port 502, only numbers above 1023 are supported as Port numbers.
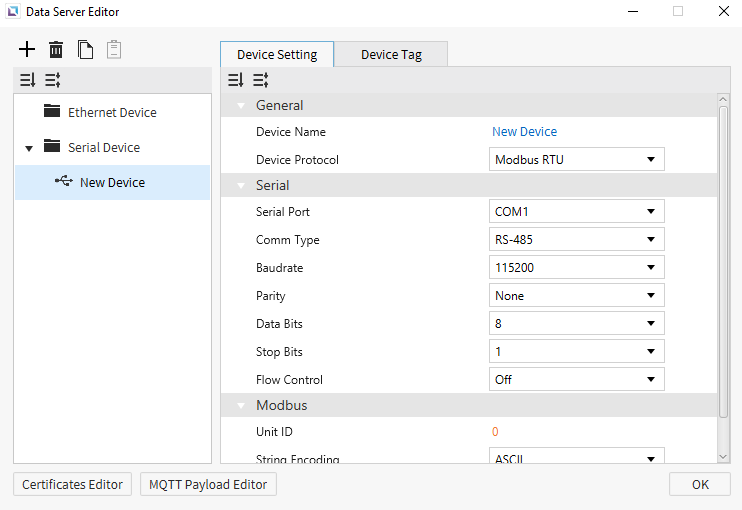
Serial Device
Serial Devices are used when a connection to another device is made via a serial cable. Users will need to input the Serial Port of the device they are connecting to, the Comm Type, and the Baudrate. Users can also select the PLC Type, the String Encoding, and the String Encoding Method. Users will also be able to change the name of the Device and the Protocol of the device as well. For Modbus TCP, users must enter the Unit ID via Modbus to connect successfully and the String Encoding and String Encoding Method. Modbus RTU is currently the only protocol for Serial Devices in the Data Server Editor.
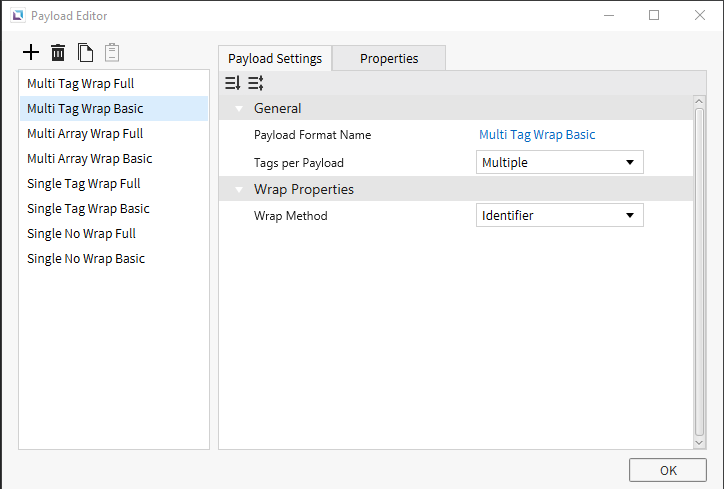
MQTT Payload Editor
MQTT Payload Editor lets users edit the MQTT message sent to the server. This will allow users to configure how payloads are configured for specific devices to match the required format. Users can configure Multi Tag Wrap Basic and Multi Tag Wrap Full as an example and change how many Tags per Payload and the Wrap Method. These can be configured within the MQTT Payload Editor as needed.
Certificates Editor
The Certificates Editor is used to create and edit certificate files, which can be used to encrypt and authorize any connection to the project. Users can use this feature to add more security and encryption to their projects so that no unauthorized access can happen. Users can use their own Private Key and Certificate for their project.
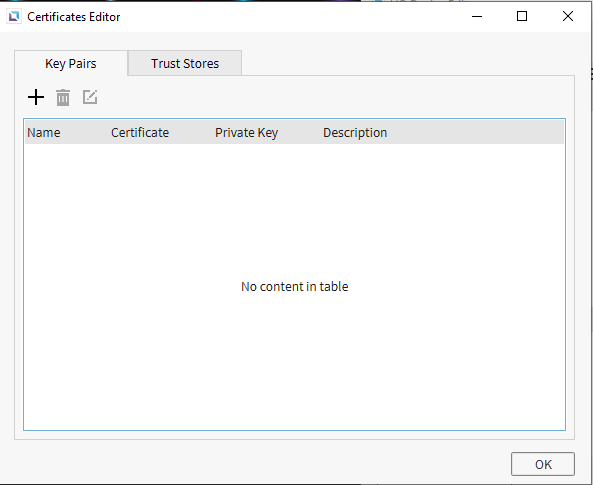
Key Pairs
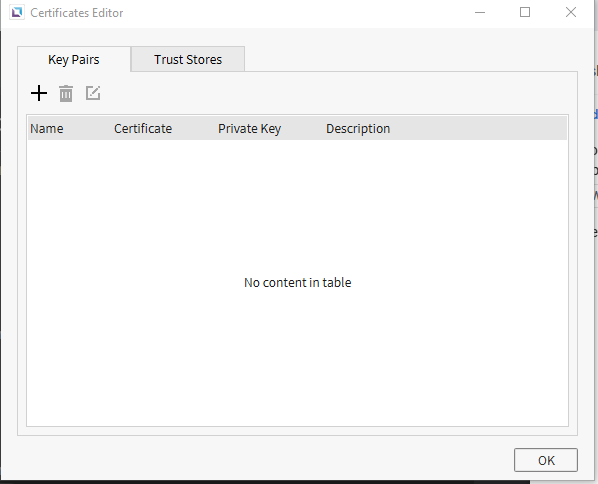
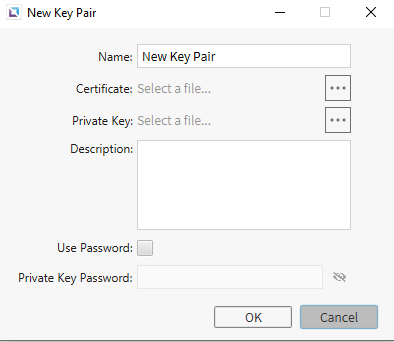
The Key Pairs page is where users can see their current Key Pairs. Clicking the + icon will create a new Key Pair. Users will need to insert a Name, a Certificate, a Private Key, and a Description. Users can also add a Password for the Private Key as an additional layer of security. Users will also be able to Delete and Edit any current Key Pairs they have.
Trust Stores
There is also a Trust Stores tab, where users can put all known certificates they use within the project. This is where certificates will be verified by the project to confirm that they are acceptable. Users can click the + icon to create a new Trust Store. This will open the New Trust Store pop-up page. Users will need to add a Name, Certifications, and a Description. Users can Delete and Edit any Trust Stores already created.

